
DIY forge burner plans unlock the world of blacksmithing by guiding enthusiasts through creating a forge burner from scratch. This essential tool is the core of metalworking, allowing artisans to shape raw materials into functional art pieces.
These meticulously crafted plans offer both a practical blueprint and an educational journey into the intricacies of heat, combustion, and craftsmanship.
Whether you’re a seasoned blacksmith or a novice, DIY Forge burner plans provide a platform for creative expression and skill development.
With these plans, you can customize your forge burner to suit your needs and preferences, bridging the gap between imagination and creation.
From heating metal to its malleable best to crafting functional works of art, DIY Forge burner plans are your roadmap to mastering the art of blacksmithing and transforming raw materials into enduring creations.
Source Pinterest
8 Best Diy Forge Burner Plans
Here is the list of DIY Forge burner plans:
1: Easy DIY Atmospheric Gas Forge
Source Pinterest
The construction of this simple atmospheric gas forge does not need the use of any cutting or welding equipment. It is a straightforward process that requires using hand tools, which you may already own.
You may need a 2-inch hole saw to drill the hole and install the burner holder. It is the only thing that you could need to purchase.
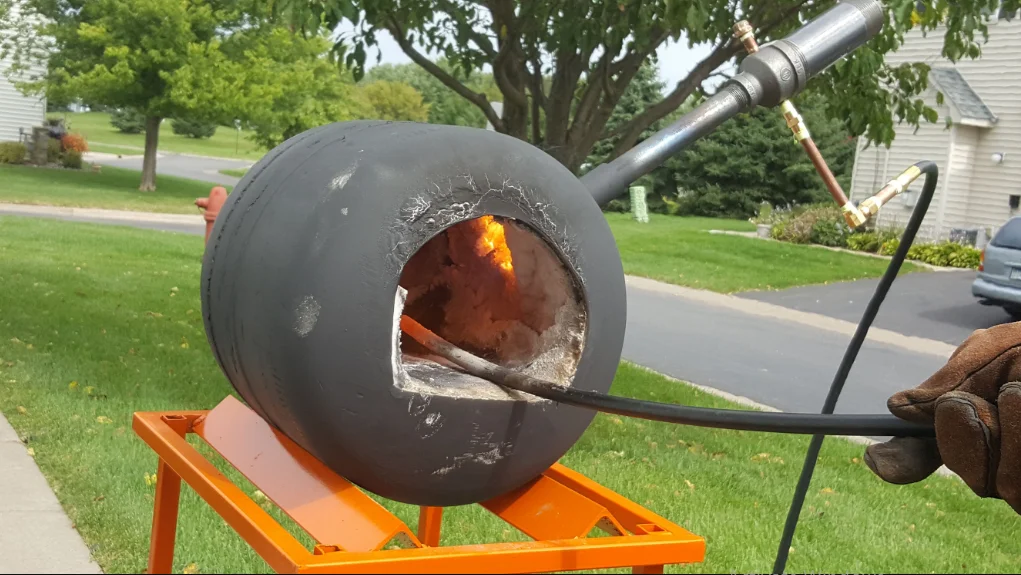
2: Homemade Propane Forge
Source Pinterest
Making your forge at home is much more cost-effective than purchasing one. But before you start constructing your forge, you must thoroughly assess your requirements and choose the tank you want to use.
The demonstration uses a forge that is 14 inches long and 9.5 inches in diameter.
3: DIY Blowtorch Fire Brick Forge
Source Pinterest
This little propane forge is ideal for heating things and mixing if you don’t need a forge regularly. However, properly assess and focus on the amount of gasoline used.
Get yourself some fuel, fire bricks, microfiber insulating material, a perforation metal heavenly being, some twisted rods, and a blowtorch are the components of this project.
4: Small Homemade Forge
Source Pinterest
How can one create a DIY forge on their own with limited money? If you like creating jewelery at home or heating and mixing little bits of metal, this handmade mini-forge is an excellent source of heat for you to use.
If you are interested in any of these activities, read on. Remember that the temperature inside this small forge may reach up to 2500 degrees Fahrenheit.
5: Gas Forge Building plan
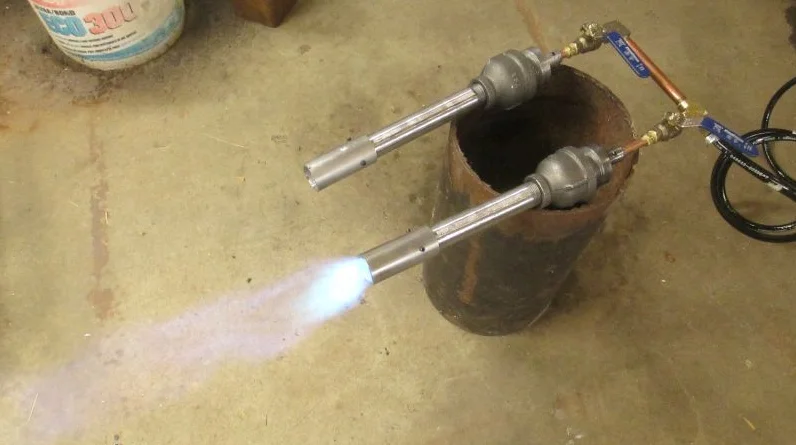
Source Pinterest
For a safe and efficient gas forge building plan, gather fire bricks, a burner, and brass torch tips. This versatile forge can run on either gas or charcoal, offering flexibility.
However, a propane-powered DIY blacksmith forge is ideal for residential settings. Its ease of use and controlled heat make it a practical option, providing a reliable and safe setup for blacksmithing projects.
6: Cute DIY Propane Forge
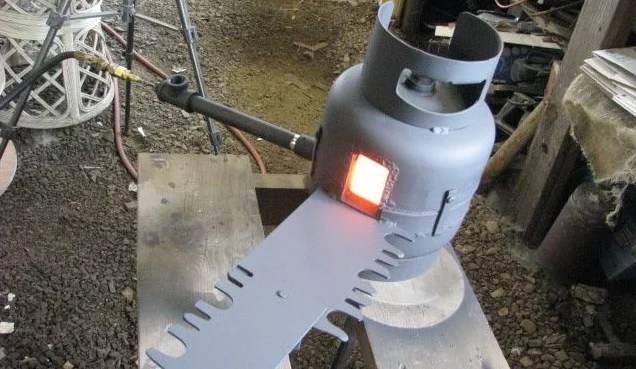
Source Pinterest
To create a DIY propane forge, start with an old propane tank. Begin by removing the collar from the tank using a hammer, but exercise caution and ensure it’s completely void of gas. Safety is paramount.
Once the tank is gas-free, fill it with water to neutralize any remaining gas residue. Then, follow a comprehensive DIY forge tutorial that provides step-by-step instructions on constructing a functional and safe propane forge.
Such tutorials guide you through the entire process, from tank preparation to burner assembly, ensuring you have a reliable and efficient tool for blacksmithing or metalworking projects while prioritizing safety at every stage.
7: Propane Forge
Source Pinterest
Making knives, blacksmithing, glass, and any other DIY project that you believe will need heating up to quite a high temperature may all be accomplished with the help of this tutorial’s step-by-step instructions for building a gas forge at home.
A helpful hint for this do-it-yourself forge is first to do an extensive study into the process of working with propane and blacksmith forges.
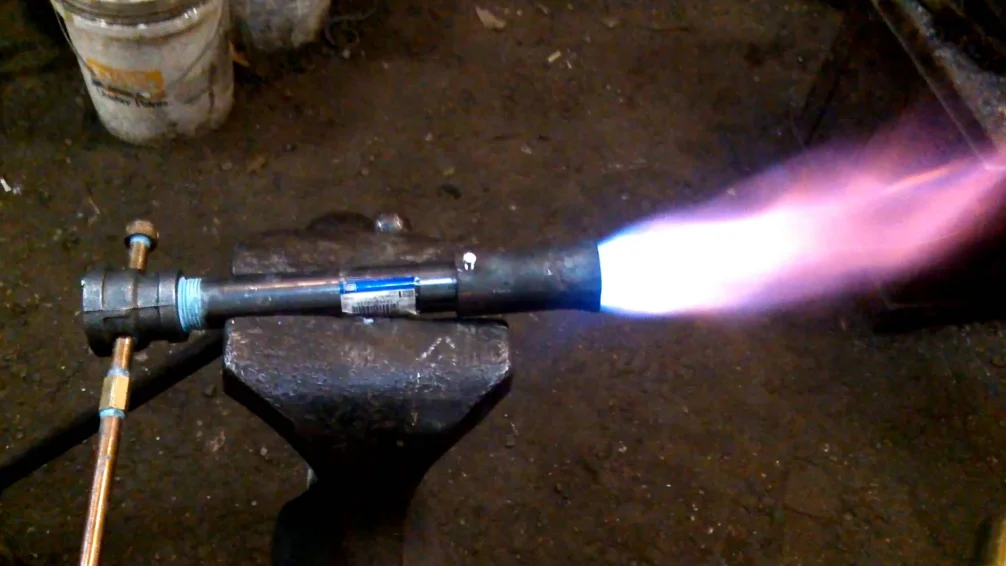
8: Make a DIY Gas Forge Burner
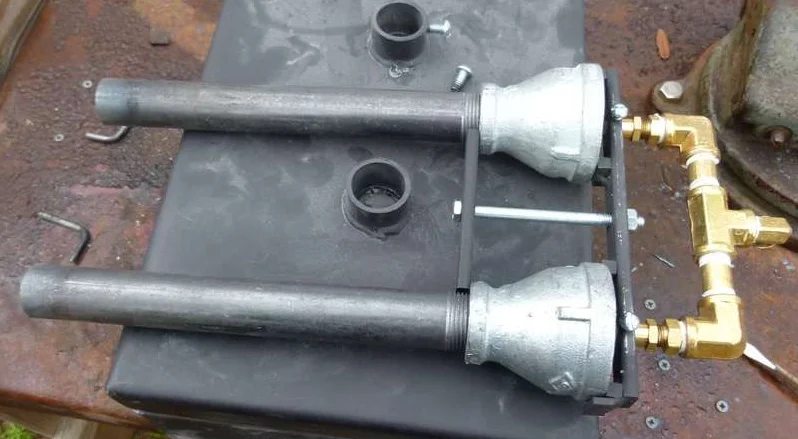
Source Pinterest
Creating a DIY gas forge burner is a project that calls for some essential tools: a drill, drill bits, and files. You’ll also require a gas regulator readily available at welding supply shops to operate this burner safely and effectively.
The burner assembly involves drilling holes in a pipe and filing them precisely. Once completed, the burner can be connected to a gas source through the regulator, allowing you to control the flame and temperature for various blacksmithing or metalworking tasks.
It’s a practical and cost-effective way to set up a functional forge burner for your DIY projects.
Tips for Forge Burner Construction
When crafting a forge burner, certain precautions and choices can make a significant difference in its effectiveness and safety:
Tube Length Matters: Opt for an 8-10″ long black iron tube rather than a short one. Short tubes can heat up rapidly, posing risks as the torch scolds hot.
Choose the Right Material: Black iron tubes are preferred as they don’t conduct heat as efficiently as other materials, ensuring a safer and more controlled heat flow.
Consider Galvanized Tubes: If black iron pipes are unavailable, galvanized tubes can be used. However, they may emit harmful zinc vapors when heated. To counter this, soak the galvanized tube in vinegar for at least 8 hours, dissolving the zinc coating and enhancing safety.
How to DIY Forge Burner?
Components:
Equipment and Tools:
- Hand-held Drill
- Center Punch
- Wrenches with Adjustable Jaws
- Soldering and Flux for Plumbing
- Blow Torch
- 1/2″ MIP (Minimum Inside Diameter) Tube, Minimum Length 10′
- LFA-810 1/2″ FIP Brass Pipe Coupling
- A-708 1/8″ FIP Brass Pipe Cap
- Nipple for Pipes, 1/8″ MIP x 2″, Brass, Model A-717
Constructing Torch: A Step-by-Step Guide
Creating a torch involves several meticulous steps for precision and safety. Here’s a simplified breakdown of the process:
Prepare the Components: Assemble the Brass tube to ensure a secure connection between the 1/2″ Flared x 1/2″ MIP Union. A nip of 1/8″ MIP x 2 is used.
Threaded Union: Insert the male threaded end of the union into the female threaded coupling opening, sealing the joints with thread sealant or tube tape
Orifice Hole: Drill the tube. Replace the 1/8″ FIP cap with the one from the 1/32″ bit to create the orifice hole.
Additional Holes: On the steel pipe, bore four holes just after the threads using 1/4″ drill bits.
Soldering: The “aligned nipple assembly” can be created by soldering together the 1/2″ Flare x 1/2″ MIP Union and the Nipple 1/8″ MIP x 2. To accomplish this, ensure that the Brass Pipe coupling 1/2″ FIP is properly aligned with the steel tube.
Orifice Assembly: Attach the Cap for the 1/8″ Tube to the Nipple 1/8″ MIP x 2 by screwing it into the orifice hole, forming the “orifice assembly.” Connect the Coupling 1/2 FIP to it.
Securing Steel Tube: Fasten the steel tube with 1/2″ holes to the Coupling 1/2 FIP on the opposite end using screws.
Adding Coupling: Attach the Pipe connection 1/4″ FIP to the opposite end of the orifice assembly using the appropriate screws.
Hex Bushing Joining: Combine the Hex Bushing 1/4″ MIP x 1/8″ FIP coupled with the 1/4″ FIP Pipe Coupling using screws.
Connecting the Nozzle: Attach the tube Hex Bushing connection to the Low-Pressure Natural Gas Quick Releasing Plug 1/4″ MIP using a 1/4″ MIP x 1/8 FIP fitting.
Nozzle Flaring: Craft a nozzle flare from sheet metal, forming a cone shape. Attach it to the steel tube with drilled holes and self-tapping screws. Consider using stainless steel for the nozzle after testing the torch’s performance.
Testing and Safety
- Establish a connection between the gas tanks and the regulator, then link the fast connection to the burner.
- Prioritize safety with goggles when dealing with flames.
- Check solders joints for cooling and any scalding parts in contact.
- Inspect joints for leaks using soapy water; seal any identified leaks.
- Light the torch with a BBQ lighter and run it at 6-8 psi, adjusting as needed.
- The torch’s flame is approximately 6-10 inches long; customize it by altering the orifice size, intake hole, or nozzle flare as required.