
DIY fence plans are your go-to resource for crafting a successful fencing project. These comprehensive plans provide a step-by-step guide to help you achieve an aesthetically pleasing and sturdy fence for your property.
They offer invaluable insights into material selection, fence height determination, and the use of appropriate supports.
Following Diy fence plans gives you the knowledge and confidence to make informed decisions throughout the project. Whether you’re a seasoned DIY enthusiast or a novice fence builder, these plans are your trusted companion. They ensure your fence meets functional needs and enhances your property’s overall appeal.
Incorporating these plans, you can create a beautiful, durable, and functional fencing solution that suits your specific requirements. So, if you’re embarking on a fencing endeavor, Diy fence plans are your essential tool for a successful and satisfying project.

Source Pinterest
List of 10 DIY Fence Plans
Here are the top 10 DIY fence plans:
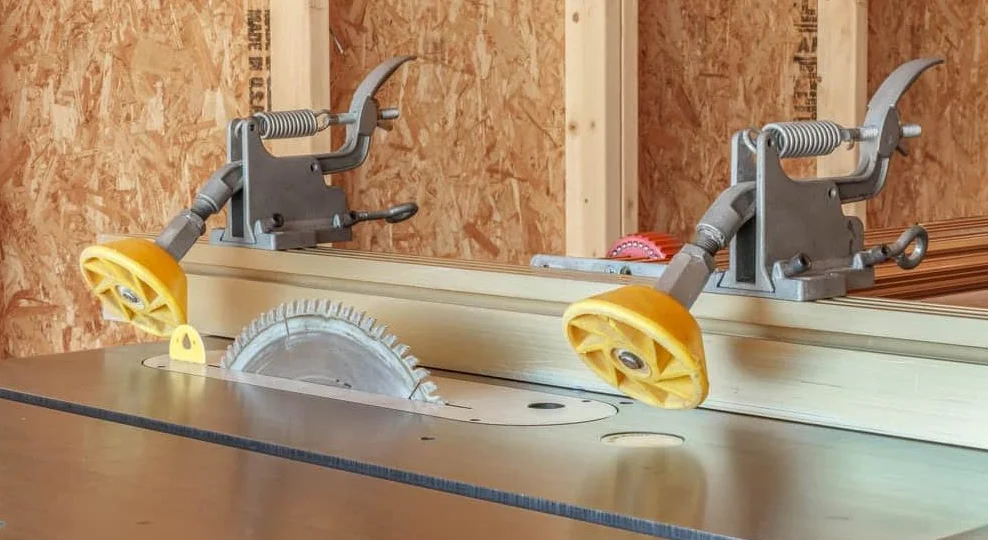
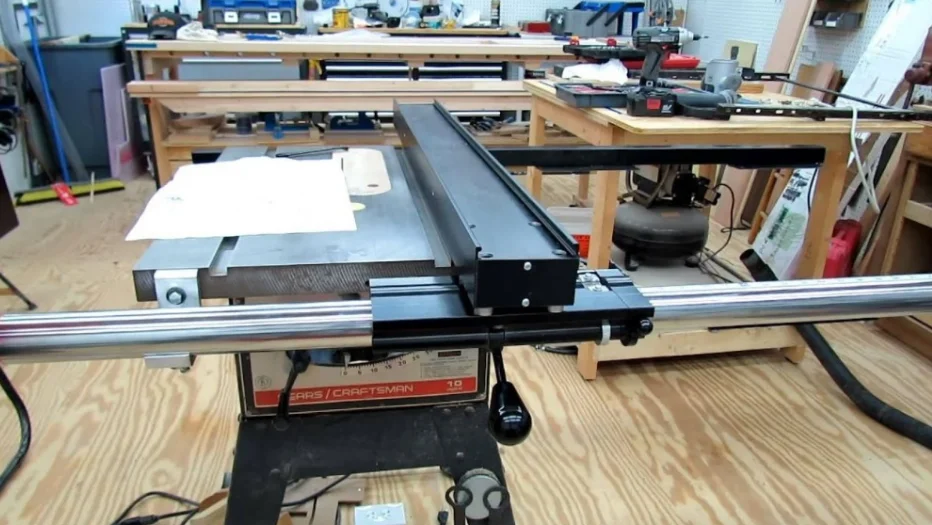
1: Wooden Table Saw Fence

Source Pinterest
Put in a new fence on the table saw. This fence system, however, may only be made by visiting a store. DIY table saw fence systems are simple to construct using common tools and materials in any home or professional wood shop.
If you’re serious about honing your abilities, try this do-it-yourself table saw rip fence. For this project, you will also need a drill, clamps, wood glue, wood screws, a tape measure, a drill press, nuts and bolts, sandpaper, and MDF boards.
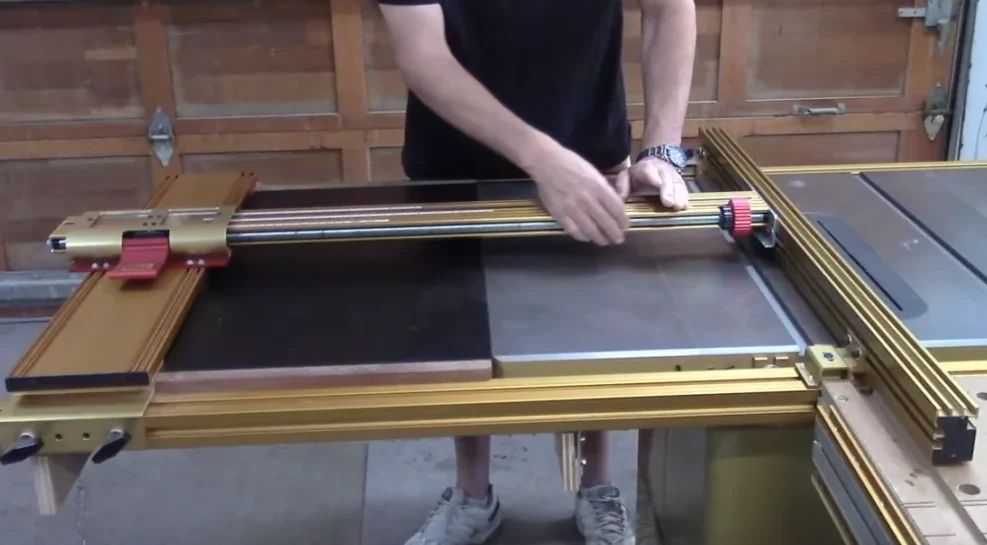
2: DIY Proxxon Table Saw Fence
Source Pinterest
The Proxxon table saw is, without a doubt, the most reasonably priced option. Putting the gate around this saw will make it fully functioning. There’s no need to visit a specialty woodworking store for this. Use this simple how-to guide to make it on your own.
Putting up a DIY table saw fence will allow you to construct a unique and long-lasting saw. Get out your aluminum extrusions, plywood sheets, wooden rails, carriage bolts, nuts, wood screws, wood glue, electric drill, drill bits, tape measure, clamps, and hammer and get to work.
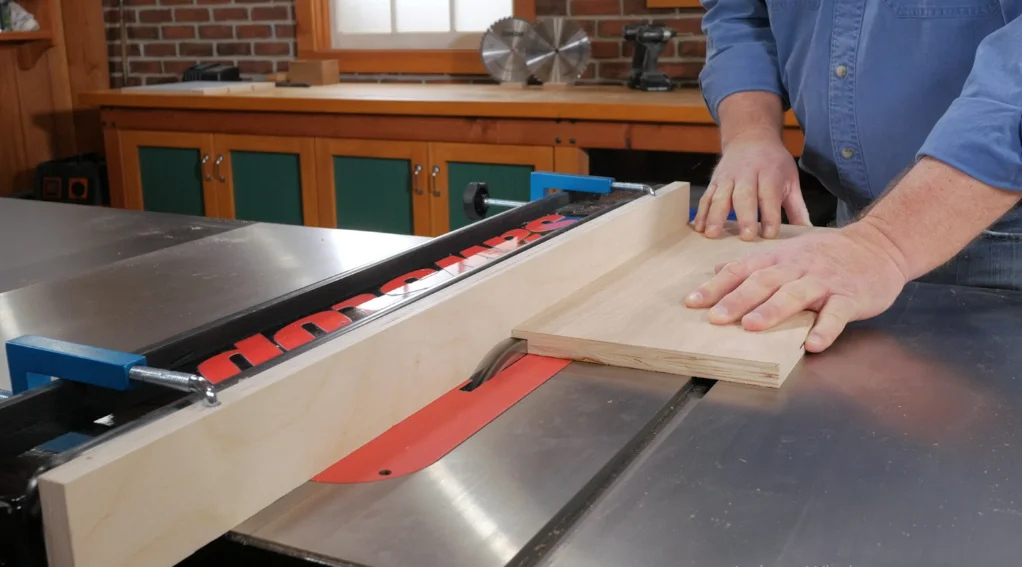
3: Table Saw Auxiliary Fence
Source Pinterest
The table saw’s pre-built fence is a certain time saver. However, the saw’s support system should be upgraded every few months, so you’ll need to replace it eventually. You can pick up a table saw fence at any local store.
If you follow the steps in the blueprint, you can create it for very little money and labor. A unique fence built around the saw will allow you to do your tasks with more peace of mind.
You’ll need a melamine board, a plywood board, wood glue, A workbench saw, wood fasteners, drill bits, a screwdriver, and clamps are some of the tools and equipment that are at your disposal to construct this fence for your table saw.
4: DIY Table Saw Fence
Source Pinterest
Use this do-it-yourself guide! If you follow the instructions carefully, you can build this fence in a weekend. This DIY table saw fence will undoubtedly facilitate sawing tasks. To construct this rip fence, use melamine boards, aluminum profiles, fence guide channels, wood screws, wood glue, a power drill, clamps, a screwdriver, and tree nuts.
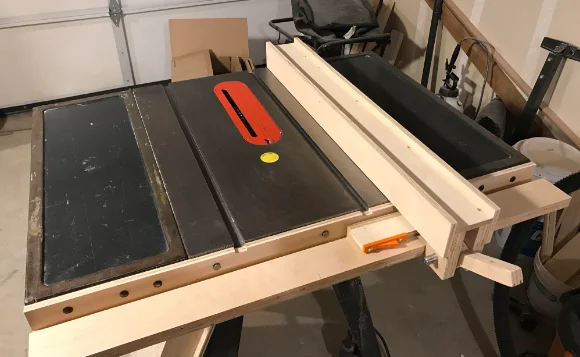
5: The Homemade Table Saw Fence
Source Pinterest
It Does It Yourself Plan will walk you through making a simple, cheap track fence for your table saw. This fence may be built using a handmade saw, the preferred method. The ideal material for this fence is the leftover wood from your workshop.
However, keep the lumber quality high if you want your project to endure. Get started on this track fence by gathering wood waste, plywood boards, a trim router, a saw, a power drill, wood screws, wood glue, casters, nuts, nails, a brad nailed, a hammer, and a screwdriver.
6: Upgrade DIY Craftsman Table Saw Fence
Source Pinterest
Use this do-it-yourself fence blueprint to improve and customize the height of an antique craftsman table saw. It is a great DIY project for a craftsman router table to give it a fresh coat of paint or add new features.
This router or saw fence requires T-squares, plywood, channelling material, wood glue, wood screws, bolts with nuts, a screwdriver, a table saw, a power drill, drill bits, a measuring tape, and a trim router. View the additional DIY photos for further instructions on implementing this design.
7: Easily Table Saw Fence
Source Pinterest
This do-it-yourself table saw fence is really simple to construct. You likely already have everything you need in your woodworking shop to complete this project. You won’t need to go out and purchase anything fancy or new to do this.
The proper woodworking equipment is all you need to get your hands on this sturdy table saw fence. Beginner woodworkers may easily complete this extended table saw fence by following the supplied video instructions.
8: Build Table Saw Fence

Source Pinterest
Use your newfound knowledge to construct a table saw fence that meets all your needs. The video that goes along with this will provide you with all the specific instructions you need. In a perfect world, the necessary components, such as the materials and supplies, would also be incorporated into this design.
If you have a design and follow the instructions, you can build this fence without touching a piece of 3D modelling software. Channelling or modelling material, nuts, bolts, wood boards, wood glue, wood screws, power drill, screwdrivers, clamps, and measuring tape are all needed for this project.
9: T2 Craftsman Table Saw Fence

Source Pinterest
Even if you have a vintage Craftsman table saw in your garage, you may follow these instructions to build a fence for it. Saw maintenance would be a breeze for you to do in this setup. In addition, the framework of the vintage table saw may be modified using this skill.
You’ll need a combination square, carpenter’s square, drill bits, power drill, wood glue, wood screws, wrenches, a socket set, clamps, and flathead screwdrivers to carry out the steps in this design.
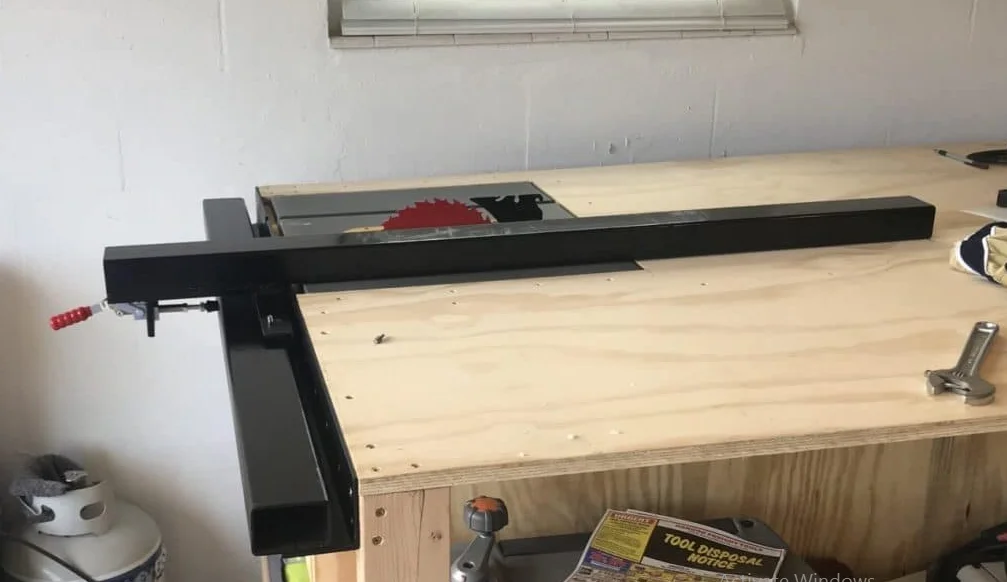
10: Ultimate Table Saw Fence

Source Pinterest
Make your universal table saw fence in a flash with this step-by-step guide. Luckily! To learn more about this project’s prerequisites and criteria, you can also see the accompanying lesson.
In addition, even a novice woodworker can assemble this table saw fence’s components by following the instructions.
You’ll also need a power drill, drill bits, a bench saw, a tape measure, and clamps, but the essentials for this project are aluminum profiles, carriage bolts, nuts, wood boards, hardwood rails, screwdrivers, wood glue, wood screws, and a power drill.
How to Build and Put Up a Fence?
If you are considering putting up a fence around your home, the following is some advice on how to construct a fence on your own:
Step 1: Choose the Correct Type of Wood
Choosing the right wood for a fence is essential. Cedar, pine, and redwood are popular choices. Cedar is rot-resistant, pine is easy to work with, and redwood offers durability.
However, cedar tends to be expensive, while pine and redwood are more affordable. Your choice impacts the fence’s longevity and cost, so consider your priorities carefully.
Step 2: Decide on the Height
Next, determine your fence’s height when doing a DIY project. It should offer protection without feeling like a prison wall. Generally, a three-foot fence strikes a balance by providing privacy and allowing sunlight into your yard.
Before you start, consider your property’s needs, as different wood types come in various sizes. If you need more height, buy extra wood or replace sections. A 4-6 foot fence is a safe choice for most homes, especially if you have a jumping dog.
Step 3: Length of the Fence
The length of your DIY fence determines the materials needed. Measure your yard to get the exact length. To save on materials, create an inside corner instead of connecting two sides end-to-end. It reduces waste and still looks great.
If you want a fence that spans your yard, plan for it to be about 10 feet longer than the measurement. The space between two walls should be double the wall’s length for an even and straight appearance. So, add 8 feet for every 4-foot-high fence to maintain a consistent gap all around. Careful planning ensures a cost-effective and aesthetically pleasing result.
Step 4: Type of Post
You were selecting the right posts for your DIY fence matters. You have two options: wood or metal, based on availability and cost in your area. Regardless of your choice, the material should be sturdy enough to endure local weather conditions.
Before installing wooden posts in the ground, you should first drill a hole in the top of each one. It also protects against termites and stops decay from occurring.
You can attach them with a metal post holder to prevent falling. If you opt for metal posts, ensure they are galvanized or coated with rust-resistant paint to prevent rusting. It ensures your fence remains durable and reliable over time.
Step 5: Use Supports
Use supports like metal T-posts or concrete pillars when setting up your DIY fence. They’re crucial for stabilizing your fence, especially in windy or rainy conditions. Place these posts evenly along the fence’s length and ensure one at each corner.
Install these support posts before putting up the fence itself; they’ll help hold everything in position as you work. If you’re using wooden posts, treat them with a water-resistant sealant or paint to prevent rotting. It ensures your fence stays strong and upright over time.
Step 6: Install the Fence
Now, it’s time to put up your DIY fence. If you’re using wooden posts, drill a hole before putting them in the ground to prevent rot and keep termites away. Secure the post using a metal post holder. If you opt for metal posts, ensure they’re galvanized or rust-resistant.
For panel fences, begin with a post at each yard corner. Snap the panels into the posts, ensuring they face the same way with a two-inch gap between each panel. If you add a gate, install it last, leaving enough space on both sides for smooth opening and closing. This step-by-step approach makes fence installation straightforward.
Step 7: Finishing Touches
When you have finished putting up your do-it-yourself fence, consider giving it a coat of paint or stain. It not only improves its beauty but also prevents the wood from deteriorating due to the effects of the weather.
It is important to remember to paint or stain the posts and panels before putting them up so that you do not get paint or stains on the ground or your clothing.
Fences play a vital role in home security and aesthetics. Wood is preferred due to its natural look and versatility in color options. As someone experienced in fence building, I’ve gathered insights and tips to help you start your project and avoid common mistakes.
If you want to learn about modern fences, read our article on the modern horizontal fence.